Step 1
Once the cistern has been installed but before the tiles are laid, cut the protective casing using a cutter.
Not registered?
If you have not yet registered on the Valsir web site fill in the form with your details and obtain free access to the download area where you will be free to download our price lists and technical brochures. You will also have the possibility of receiving our periodic newsletter: the best way to remain up-to-date on all the latest developments in Valsir.
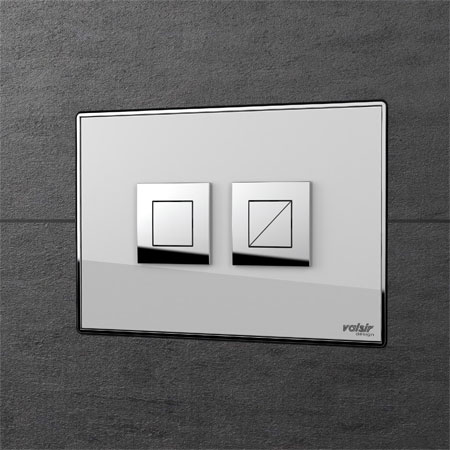
Once a purely functional object, the push plate became an aesthetic element inside the bathroom. Along with design, technology improves Valsir offer: the aesthetic appeal combines the wide choice of push plates fulfilling any client’s need, even for wallflush push plates.
Valsir developed a system that allows a quick placement of the push plate inside the wall. Installation is simple, job is flawless and the result is perfect!
This system allows the Valsir Design push plates to be installed flush with the bathroom tiles.
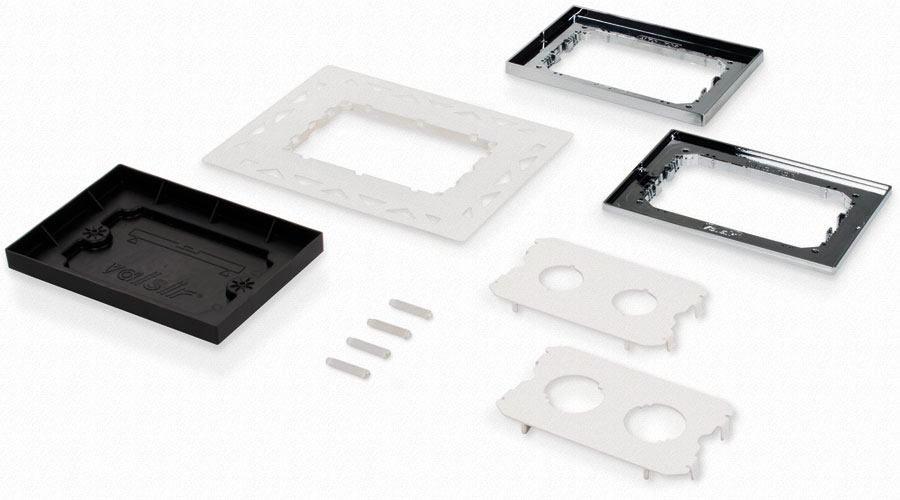
Installation is simplified thanks to a reduced number of components.
The product is supplied with 4 depth adjusters to ensure the frame is perfectly aligned with the tiles from a minimum of 7.5 mm up to a maximum of 41 mm.
The push plate can be customized using the same material used to decorate the bathroom.
The frame is available in polished or satin chrome for a correct match with the control buttons and the bathroom taps.
Reduced size: 215x145 mm.

Once the cistern has been installed but before the tiles are laid, cut the protective casing using a cutter.
Position the support frame, essential to allow adjustment of the plate depth once installation has been completed.
Install the protection device using the plate fixing adjusters.
Use a spirit level to ensure that the installation is perfectly horizontal: the device works also as a reference for laying the tiles.
Lay the wall tiles flush with the protection device, embedding the support structure in glue.
Remove the protection device and screw on the 4 depth adjusters in the 4 corners of the frame. Cut them if necessary.
Position the frame, insert it in the space provided, and adjust the position until the level of the tiles is reached using the 4 depth adjusters.
Apply the adjusters to the chrome frame to secure it.
Cover the space around the chrome frame with the tiling grout.
Replace the steel centering device supplied with the Valsir Design push plate with the adjuster provided in the kit.
Connect the buttons to the pneumatic system of the flush cistern.
Insert the push plate in the chrome frame until the “click”.
![]()
Valsir S.p.A.
Località Merlaro, 2
25078 Vestone (BS - Italy)
Tel. +39 0365 877 397
Fax +39 0365 81 268
valsir@valsir.it